I have been thinking of protecting our special dishes located in our dining area. You see, our old 'buffet' or cabinet was destroyed by the flood that devastated Manila in 2009.
And the only things available and ready to be delivered while shopping a few days after experiencing that flooding were book shelves which we turned into cabinets for our special dishes. It was supposed to be a temporary arrangement that simply stayed. Therefore, those special dishes gather dust and are vulnerable to all elements (by elements that includes our dog and the girls).
I have been thinking of buying something to keep those dishes safe since about three years ago. No, not a new cabinet; at least, not yet. Then I thought, why buy when you can sew something?
I was sorting out our clothes last weekend when I saw an old bathrobe. And an idea formed. Why not use this robe to create those dish protectors?
Last Monday, I finally let my sewing machine breath. It's been shoved in one corner for more than three years! I added my sewing kit, some scrap cloths and found a place in the dining table for my new project.
Again, here's what I needed to create the dish covers:
- sewing machine
- sewing kit (assuming everything's in there such as needles, threads, tape measure, etc)
- a pair of scissors
- a roll of kitchen paper (I initially planned to use those cloth scraps as lining but they were too heavy. Then I skipped those rice sacks because they were too unstable. I ended up with the kitchen paper because they were thick enough to keep the cloth steady and they passed the sewing machine test perfectly.)
- some cloth scraps
How to create dish covers from an old bathrobe:
- First, measure the dish you plan to cover. If you need to stack them up, to re-arrange them, do so before measuring.
- Cut the bathrobe according to size (the sleeves were perfect sizes for some of my dishes!)
- Then cut kitchen paper to use as a lining, pin them in place
- Start sewing them together.
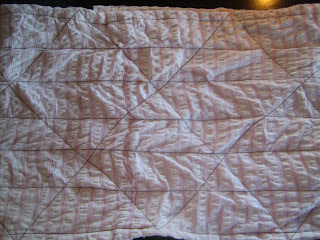
- Criss-crossing those stitches, too. Then sewing the ends together.
- I added a ribbon from a scrap cloth by handsewing it. My first dish cover is done after 20 minutes! (And I waited three years to work on this idea!!!)
- I also experimented on a cover for my dish covers. Well, I wanted a round one but it's easier to create a square one, so...
- Simply measure, cut, add the kitchen paper, fold the corners, pin them and sew them together.
- Because the top I created is square, I made a square dish cover by sewing the four corners of a round dish cover.
After a day and an old bathrobe, I ended up with six dish covers! The girls helped me in sewing them when they arrived home from school.
They were so enthusiastic about what we did that IC even exclaimed,' Mama, you can sew again! Wow, I am glad!'
Next, IC wants to design and sew her own t-shirt and some hair accessories. We have enough old bathrobes to work on!And the only things available and ready to be delivered while shopping a few days after experiencing that flooding were book shelves which we turned into cabinets for our special dishes. It was supposed to be a temporary arrangement that simply stayed. Therefore, those special dishes gather dust and are vulnerable to all elements (by elements that includes our dog and the girls).
I have been thinking of buying something to keep those dishes safe since about three years ago. No, not a new cabinet; at least, not yet. Then I thought, why buy when you can sew something?
I was sorting out our clothes last weekend when I saw an old bathrobe. And an idea formed. Why not use this robe to create those dish protectors?
Last Monday, I finally let my sewing machine breath. It's been shoved in one corner for more than three years! I added my sewing kit, some scrap cloths and found a place in the dining table for my new project.
Again, here's what I needed to create the dish covers:
- sewing machine
- sewing kit (assuming everything's in there such as needles, threads, tape measure, etc)
- a pair of scissors
- a roll of kitchen paper (I initially planned to use those cloth scraps as lining but they were too heavy. Then I skipped those rice sacks because they were too unstable. I ended up with the kitchen paper because they were thick enough to keep the cloth steady and they passed the sewing machine test perfectly.)
- some cloth scraps
How to create dish covers from an old bathrobe:
- First, measure the dish you plan to cover. If you need to stack them up, to re-arrange them, do so before measuring.
- Cut the bathrobe according to size (the sleeves were perfect sizes for some of my dishes!)
- Then cut kitchen paper to use as a lining, pin them in place
 |
| Pin the cloth and the kitchen paper in place |
 |
| Sew them together |
- Start sewing them together.
 |
| Criss-cross stitch |
 |
| My first dish cover |
 |
| An experiment cover... |
 |
| The cover is done |
 |
| A square dish cover |
They were so enthusiastic about what we did that IC even exclaimed,' Mama, you can sew again! Wow, I am glad!'


2 comments:
Huwaw naman may talent ka pala sa pananahi!Very pretty ng mga ginawa mo!
hi anney, salamat! kapag ginaganahan, i love sewing, too.
Post a Comment